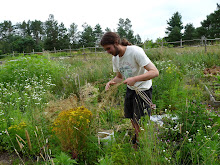
The garden is at its leafy, blossom-filled peak right now, and so are the weeds. The hot weather and regular rains that we've had since June have been a blessing for plants both domesticated and wild alike, it's all I can do to push the weeds back enough for the cultivated ones to take up a dominant place... this is not an immaculately tended garden by any means! The newly seeded hay meadows are a riotous, tumbling profusion of wild mustard, ragweed, goldenrod and bindweed, however after scything down these opportunistic meadow dwellers I've discovered a healthy carpet of my cultivated grasses, previously hidden from view - a good sign for next year.
Our own hay meadows are another year away from maturity (they were just seeded this spring after wresting the land from the forest a few years previous) but we have the good fortune of having a neighbour on one side who has more land in grass than the inclination to cut. We've been scything and making loose hay up in that field for the last couple of weeks, it's definitely a learning process for me. Following the very thorough instruction from the Vido Family (you can read one of the articles here) and from what they showed me last summer when I spent some time at their farm I built a couple of hay racks and then went at it. The rack construction is really simple, I made mine with scrap 1x3 lumber, although future models might be made from coppiced hardwood poles from the forest. They're basically two square frames leaning against each other (like an A-frame) and tied with twine at the top (they fold for easy storage and transport).
My current hay making process is to cut the grass and leave it in it's windrow for one full day. I initially planned to spread the windrows so the grass dries more evenly but I've found that mature timothy and orchardgrass (and other course, airy plant matter) dry just about as fast without spreading. After that time I rake the grass into heaps with a wooden hay rake (hand made from yurt-pole cutoffs and with wooden teeth which avoid digging into the ground - photos on the way) and stack it up on the racks, forming a hay cock. After it's stacked the grass continues to dry with air circulation underneath it, and the bulk of the grass on the inside won't fry to brown in the sun like it would if exposed. I take the hay into the barn as soon as I can, though if built with enough skill a cock (or any other version of hay stack) can stay in the field and for some time without getting damaged by rain. I haven't yet mastered the cap design (ideally it should shed water like a thatch roof) and the cock pictured here got soaked in that last thunder storm we had. It was wet and steaming away like a compost pile from microbial activity when I dealt with it a few days after, it made an excellent mulch for the tomato patch! So there's lots to learn yet... I'll keep at it between weeding and tomato staking and the myriad other jobs on the mid-summer farm.


No comments:
Post a Comment