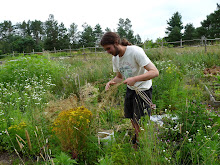
Saturday, July 25, 2009

Intensive Succession Planting

If you really want to maximize your harvest from a small plot of land (and I think most readers do) you should definitely think about planting multiple crops in succession in the same spot over the growing season. Too often people (myself included) plant a crop in the spring, harvest it in say late July, and then leave the ground bare into the fall, not realizing the potential for late-summer/fall growing. In our food garden today we removed and composted the old pea vines, tilled in the weeds and debris and then created two long planting strips in the beautiful dark Earth.

We'll let the planting area sit and mellow for roughly a week (maybe less if we can't wait) before we plant salad greens and a fall crop of carrots. That gives the leafy green debris that was tilled in a chance to decompose a bit before we plant. We could have also tilled the full pea vines into the soil, returning them directly. If we did that we would probably have to wait a bit longer to plant the succeeding crop. As fibrous plant matter decomposes the microbes actually draw the available nitrogen from the soil and tie it up, not a good thing for any crops that you're trying to grow simultaneously. I think it's best to haul the plant matter away to the compost (to be spread on the same soil later of course) if really intensive growing is your goal.

In the Annapolis Valley there is still plenty of time to plant lettuces, spinach, carrots, kohlrabi, most leafy brassicas, turnips, chard, beets and even early maturing peas. Alternatively you could also plant green manure crops to enrich the soil after the main crop is finished. I like to plant buckwheat to succeed my pea seed crop which comes out in August. The buckwheat gets tilled back in to the soil in September or October when it's flowering, feeding an influx of organic matter to the abundant soil microbes and earthworms.
Before: picking up the pea stakes before scything down the plants.


Taking a post-scything pea break:
Incorporating organic matter while creating an annual plant promoting soil disturbance (that's a lot of words to decribe tilling).

After: the finished bed ready for planting.
(Thanks to Regine for the photos!)

Tuesday, July 7, 2009

Scythe Artwork

Recently we set out to create the below piece of farmer-style protest artwork in our neighbor's hay meadow, a giant 350. The significance of 350 is that it's the maximum parts per million of CO2 that the atmosphere can contain without seriously disrupting the present ecological balance of Earth. The idea is outlined by 350.org and in far deeper detail and insight by the Vido Family (www.scytheconnection.com/adp/grinning/index.html). For us it was mainly a fun project to spend a beautiful summer evening working on, but the more serious message behind it is to demonstrate a human-powered, human-scaled and totally fossil fuel free way to turn grass and weeds into feed for ones animals, with a scythe! The grass that was cut for the design was fed to the animals, and although it was rained on several times the goats relished it.


To make the design I first selected a fairly good stand of grass near a big aspen tree, the tree was crucial because otherwise I wouldn't be able to photograph the thing. Because of this the angle isn't ideal, it was hard to find a big tree with good grass nearby (the field has been more or less abandoned for 7-8 years and the grass is sparse). I staked off a rectangle and mowed a swath around the outside of the design. I then made thee even blocks of grass for each number and then carved them out freehand. And there you have it, my totally amateur scythe powered artwork attempt.

Tuesday, June 30, 2009

The Mid-Summer Garden

A rainbow over the soybeans:


The recently staked pole bean patch:


Triple Treat Peas:

Russian Sugar Peas:


Golden Sweet Peas (red flowers and edible yellow pods):

Early Wonder Tall Top Beets:

Saturday, June 27, 2009

Yurt Updates

Now that I have the garden reasonably under control I've been working on stringing together the yurt poles into the wall sections. The poles are attached simply by drilling holes spaced exactly 12" apart and tying a short length of twine through the holes. The plan for my 14' yurt calls for three wall sections, two of which I've completed while the third is under construction. After the leaves fall in October I'll cut a nice, straight ash tree in the forest for the tono wheel. I'll cleave it into two planks with a froe which will then be steamed to form the wheel. The roof poles are now oiled and finished, they just need to be cut to length and have their taper made once the tono wheel is complete (the wheel has to come first). I'm hoping the whole thing will be finished sometime this fall, maybe late-October or November.

An interesting concept that I'm building into the yurt is to have at least one pole representing every hardwood species in our forest (minus the rare ones which I wouldn't want to cut and weaker woods like aspen). So far I have red maple, sugar maple, striped maple, white ash, red oak, white oak, paper birch, grey birch, american beech, american elm, linden, speckled alder and black cherry, though the bulk of the poles are ash and maple. It's kind of a symbolic gesture that celebrates the unique diversity of the Acadian forest. When you think about it, a yurt is just about the lowest impact form of shelter when it comes to materials needed from the ecosystem. In all it takes just a few big armloads of biomass (biological wealth) taken out of the forest to fashion a warm, dry shelter (human wealth). Contrast that to a new house. And when the organic based yurt has finally reached the end of its life it can be wholly returned to the earth, the atoms and minerals of which may continue their cycle in a tree, another yurt, a salamander or a human being...

More to come...


Carrying a folded wall section. It folds like an accordion into an easily managed size.
The roof poles (right) spread out while their linseed oil coating dries. Note the smaller diameter wall poles (left) that have been shaped while they were curing to be permanently bent.

Thursday, June 4, 2009

Scything Season

Once again the grasses are almost waist high and rapidly forming their seed heads, like they do every June. The cows having gotten a taste for fresh grass refuse to eat the old hay, so Colin's job lately has been to cut and gather a manger full of grass for Bessie every evening for after her milking. Over the last month Colin has really gotten into scythes. He began in May by insisting on using my full sized one (with a surprising deal of success), until Peter Vido (http://www.scytheconnection.com/) very, very kindly made him a lighter "Colin sized" model. Truly a functional work of art, it makes the cumbersome snath that I made for him seem pretty crude in comparison (but hey, it was only my second attempt!).
Colin even has plans of entering the annual mowing competition this August at Ross Farm. I'm still working with him on his technique but he's about as good as I was when I first started, despite being less than half my age at the time.


Wednesday, June 3, 2009

Lots to update on

I'm finally able to do some writing again after a solid month of garden and farm work. With the help of our WWOOFer Bjoern I got both the seed and food gardens planted weeks ahead of schedule. This year we've got over 60 bean varieties on the go, 40 peas and about 40 tomatoes, among many others. A few of the beans are my own strains that I'm working towards stabilizing. My most promising of these is a striped variation of the pole bean McGrath's Africa. Two years ago in our McGrath's Africa patch I discovered a plant that produced black and white striped seeds in striped green pods, rather than the usual white seeds in leathery purple pods. Last year I grew them out and 95 percent stayed true to type (which is a great rate). If I can stabilize it for a few more years I might even be able to release it as new variety, any name suggestions?


We also planted an acre of Sorghum x Sudangrass in the newly cleared upper field as a green manure crop. Without the ideal equipment of a harrow and some power source to pull it (animal or machine) I ended up broadcast seeding it and then zipping over the field with the rototiller set to it's fastest speed. I set the tines very shallow so that it only mixed the top two inches or so of soil, it worked almost like a rake. A small corner of the upper field we've enriched with tons of manure and we've planted sunflowers, tomatoes, peppers, adzuki beans, chickpeas, millet and corn, as well as a huge patch of squash planted on mounds of manure. We're experimanting with these mounds as a way to stretch what little valuable manure we have. The roots of the squash will be growing in almost pure manure while the vines can sprawl over the less fertile soil around the mounds. We'll see how well it works.


Now that the garden is planted and Bjoern's keeping the weeds under control I'm starting to put some more time into the yurt. Last January I took a great yurt-building workshop held by Alex and Selene Cole of Little Foot Yurts over in the Gaspereau Valley. Over the winter I cut, peeled, shaped and cured the poles for the yurt, and starting now I'm trying (emphasis on trying) to get it assembled. If I'm sucessful, updates to follow...


The yurt poles after we carried them in from the woods. Note the frames used for shaping the khana poles (wall poles).