Friday, October 21, 2011

The Peanut Harvest

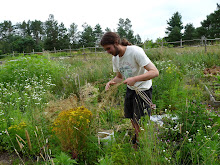
It was an exciting day on the farm last Tuesday, it was peanut harvesting day! The recent frost had killed the tops of the plants which meant it was time to pull them. I've learned a lot about growing peanuts over the last few years, and compared to the last time I wrote about them yields have at least doubled per plant in our gardens. I definitely see a lot of potential in peanuts becoming a more common crop in Nova Scotia, they're one my easiest and lowest labour crops to grow and they're pretty productive too (some plants in good soil produced up to 18 big pods, each with 3-4 seeds). We filmed a short video the other day of the harvest, check it out and send it around!

Wednesday, August 24, 2011

Two upcoming events at the farm!

We're pretty excited to be organizing a couple of events at the farm in the coming few weeks. A seed saving workshop and then the much anticipated Tomato Fest. Hope you can make it out for one or the other!

-Seed Saving Workshop - August 31, 2:00 to 5:00 pm at Annapolis Seeds - Come learn the basics of saving seeds! As we tour through the Annapolis Seeds gardens we'll discuss seed saving techniques for many different vegetables, from the easy ones like beans to the trickier ones like the brassicas. Hands-on demonstrations too! We'll practice simple and low-tech threshing and seed cleaning techniques. We'll be covering all the basics but discussions will be guided by your interests, so more advanced techniques can be covered too. Cost: $25 - $40 for couples - or pay what you can. Contact me at owen@annapolisseeds.com or 902 825-0553 to register

-Tomato Fest - September 11, 12:00 to 5:00 pm at Annapolis Seeds - Come celebrate the tomato! Experience the incredible diversity of heirloom tomatoes that you simply can't find in the supermarket. We'll have about 100 varieties on display and for tasting... you'll be able to vote for your favourite! Guided farm tours will be throughout the day and we'll have workshops on growing great organic tomatoes and saving tomato seeds. More info to come... Cost: Free! Although donations will be welcomed

Saturday, July 30, 2011

Threshing Techniques, Part 1 (Threshing Bag)

I've been meaning for some time to write a little article on our different techniques for threshing seeds (i.e. separating them from their various dry pods). We've just started harvesting and threshing certain brassica seeds here at the farm, so I thought I'd cover the ever so simple threshing bag method... my favourite technique for doing small podded seeds like kale and arugula. Coming soon will be an article on the threshing box... our main device for doing peas, beans and everything a bit bigger


#1 - After harvesting the dry pods (Mizuna in this case) I'll let them dry further for another couple days in the greenhouse or in the barn. Once the pods are super-crispy and brown and
break apart with a slight touch you know they're ready to thresh!


#2 - My strategy for brassica seeds is to put the dry pods in a pillow case (which you should be sure doesn't have any holes!) and then to smash them any which way we can. You can hit it against a wall, stomp on it, knead it in your hands, flail it, run it over in the car... those little seeds are pretty indestructible. After a minute or two of work the pods are usually all broken open (it doesn't take much if they're dry enough) and have released they're seeds inside the bag. Now you just need to separate the seeds and the chaff...


#3 - I usually just grab the large top pieces of stem and shells and remove them by hand (that's what's in the wheelbarrow here) , the seeds are heavy and almost always settle in the bottom of the bag. To separate the seeds from the smaller chaff we use both screens and winnowing.


#4 - Screens sure are handy! The seeds drop right into the bucket and the pods stay on top. We were lucky to be gifted this awesome brassica seed screen, but any old homemade screen will do. It's handy having different sizes of mesh for different sized seeds.


#5 - The final step is winnowing. The screen gets most of the chaff out but if you want them really clean winnowing is often the way to go. It's just pouring the seeds back and forth between two containers in the wind, the heavy seeds fall and get caught while the lighter chaff gets blown away. A fan works wonders on those non-windy days.


#6 - Voila! The finished seeds! These two buckets are before and after winnowing, you can see how much cleaner they are afterwards.


Tuesday, July 12, 2011

3rd New Farmers Gathering, June 11-12

It's amazing how busy one can get on the farm in the summer time... it's taken me a month to find the time to post a report from what was an amazing event back in June: The 3rd New Farmers Gathering at The Lorax near Wolfville.

Nearly 100 farmers, aspiring farmers and folks who otherwise have a passion in working with the land turned out for the two days of workshops, bonfires and sharing experiences. I was lucky to catch a couple great workshops on seed growing (with Andrea Berry) and roundwood timber framing (with Mark Alvis) among lots of others.


- Farmers deep in discussion...


- Andrea Berry (right) of Hope Seeds put on a great seed saving workshop, here we are putting the theory into practice by planting a seed saving garden.


- Another of the highlights was planting a three sisters garden, with corn, beans and squash growing together. We were transplanting the corn seedlings into the hills so that they had a head start on the beans.


- I gave a scything workshop on Sunday afternoon, which proved to be quite a popular event. After some instructions and demonstrations probably 20 people got a chance to try their hand at mowing with a scythe. Here I am demonstrating honing with a whetstone.


- Some of the first swaths...


-After the students got into it we made short work of our hay meadow, we cleared probably a 1/4 acre in the course of the short workshop. Many hands (and scythes) make light work.

Wednesday, April 20, 2011

Seed Stories Video

Here's a new video that my friend Kimberly Smith filmed during a visit to the farm last August. Really takes you back to warmer times... enjoy!

(p.s. the video player doesn't seem able to fully fit into this page, but you can click on the link to view the full screen.)

Monday, April 18, 2011

Middleton Seedy Friday, April 29

We're putting on the second annual Middleton Seedy Friday! It's once again at the Farmers' Market (held at the Railway Museum on School Street), on April 29 from 2:00 to 5:00.

Last year's event was such a success we're really planning to expand on things for this year, we'll have four free garden talks that afternoon and lots of seeds and seedlings to be had. Come trade your favourite heirloom seeds at the exchange table. But if you don't have your own seeds don't let that dissuade you, there will be free seeds available to good homes and all the local seed growers will have tables.

And please do spread the word!

Free Talks:

2:30 - Basic Seed Saving, with Owen Bridge of Annapolis Seeds
3:00 - Companion Planting, with the Hope Seeds crew
3:30 - Growing Great Garlic, with Bryan Dyck of Broadfork Farm
4:00 - Herb Gardening, with Michelle Summer Fike of Pumpkin Moon Farm

Tuesday, April 5, 2011

Our New Propagation Greenhouse

I'm very excited about the new heated propagation bed that I rigged together last week. It's a bottom-heated mini-greenhouse inside our big greenhouse, I'm hoping to use it to produce lots of tomato seedlings for the local markets later this Spring. A few days ago I planted the last of the seeds in it... we're up to 30 varieties of tomatoes to be available as starts if all goes well!

Here's how we made it:


-We laid down 1" styrofoam sheets from Home Hardware (duct-taped together in the shot) to act as insulation and to prevent the heat from dissipating into the ground. Each 4'x8' sheet cost around $10.


-Next we covered the foam with a layer of earth...


... and laid down the heating cables. They're just roof de-icing cables from the hardware store, this is an 80' length and cost about $60.


-Finally, we covered up the cables with another layer of soil, plugged in the cable and voila! Finished propagation bed! The earth retains the heat from the cables and distributes it fairly evenly. Once the cover is back on the mini-greenhouse it will stay above freezing even on cold nights when the kale in the foreground gets frosted. We also have small air heater (visible on the far right) that I might put under the cover and use if it gets below, say, -5 while the plants are up and vulnerable.

So the whole project took an afternoon to assemble and cost about $80 using new supplies, not bad considering how many hundred of plants it'll grow! The mini-greenhouse itself was an old one we had kicking around in the barn, it wouldn't be hard to rig up something similar using perhaps PVC pipes or whatever you have handy.


Saturday, March 5, 2011

Seedy Saturdays and New Retailers...

It's a melty, early spring day and the starlings are singing, the maples are flowing and you can't help but think of new seeds to try this season. I've got a pretty long list of new varieties planned already... lots of peppers and interesting new root crops (Oka and Chinese Artichokes) to give just a small preview.

It's also the time of year to head out to your nearest Seedy Saturday to buy and exchange seeds with other growers. There are more than ever this year in Nova Scotia and across Canada, check out Seeds of Diversity for the complete list. I just got back from Bridgewater which was a big hit and we'll be at the following around the Maritimes this spring:

Fredericton, March 12
Musquodoboit Harbour, March 27
Halifax, April 2
Wolfville, April 9
Truro, to be posted...
Middleton, April 29

I've also got a bunch of new retailers to announce! More places than ever will have Annapolis Seeds this spring... so far we're in: Den Haan's Garden World in Middleton, Home Hardware in Middleton, Fulton's General Store in Lunenburg, Helping Nature Heal in Bridgewater and The Biscuit Eater in Mahone Bay. More coming soon, I'll keep the list updated!

Monday, February 21, 2011

Print Catalogues are Here

The 2011 print catalogues are fresh off the presses! The folks at Integrity Printing down in Bridgetown did a fantastic job with them, and props to my friend Jen Stotland for designing the cover artwork. Everyone who has made an order in the past two years was recently sent one in the mail, but for anyone else contact me and I'll be happy to send one out!


Wednesday, January 5, 2011

Sweet Dumpling Squash


Perhaps my new favourite squash, Sweet Dumpling was a real standout in the garden in 2010. This is the second year Annapolis Seeds will have it listed in the catalogue, but last year Chris Sanford grew them for me so I didn't get a chance to try them myself. I missed out!

It's originally a Japanese variety, and a fairly new one at that dating back to 1976. They initially named it Vegetable Gourd, but sales weren't good so they changed it to Sweet Dumpling. I suspect it had a lot of both acorn and delicata in it's parentage, guessing from the shape and colour and it's dry, sweet flesh. It was probably the most efficient user of space among my squash last year, the vines only grew about 5 feet and each one produced a good half dozen fruit, so they'd be perfect for cities and intensive growing. They store fantastically as well, they don't seem to require curing like other squash do and they're quite hard when raw, so they resist cuts and bruises that lead to rotting.

The flavour is the best thing about them though. The flesh is dry and sweet and tastes distinctly like roasted chestnuts! I like them cut in half and roasted in the oven for about 25 minutes, with cheese melted on top at the end. You can fill them up with whatever topping you want. The skin is tender enough to eat too.